Basement Waterproofing for Homes With Crawl Space Connections
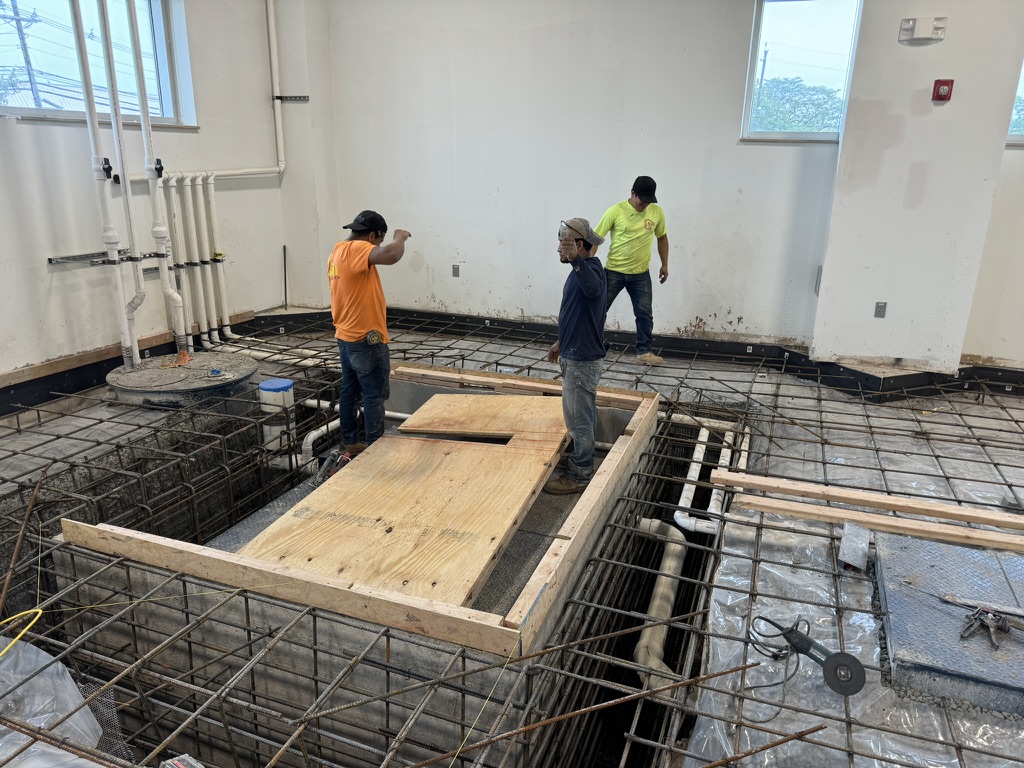
Homes that combine a full basement with a crawl space tend to have moisture behavior that is harder to predict than either space alone. On paper, it sounds simple enough. One part of the house sits on a deeper foundation, another sits on short perimeter walls or piers, and somewhere between them there is a framed opening, a utility pass-through, or a short transition area. In practice, that connection becomes a pressure point for water, humidity, and air movement.
I have seen many houses where the basement looked relatively dry at first glance, yet the musty odor upstairs was coming from the crawl space. I have also seen the reverse, where a crawl space seemed manageable but water was slipping into the basement at the shared wall after every heavy rain. That is why basement waterproofing in this type of home has to be approached as a system, not as a single repair done in one corner.
The challenge is not only liquid water. It is also damp soil, seasonal humidity, capillary movement through concrete and masonry, condensation on cool surfaces, and air carrying moisture from one zone into another. If you treat only the basement wall that visibly leaks, but ignore the crawl space soil and the transition between those areas, the house often finds a new way to stay damp.
Why crawl space connections change the waterproofing strategy
A standard basement has one moisture profile. A standard crawl space has another. Connect them and you create a pathway for pressure equalization, moisture migration, and temperature imbalance. Air does not respect the labels homeowners use. If the crawl space is humid and the basement is cooler, moist air will move toward the basement. If the basement is under negative pressure because of HVAC return leakage or exhaust fans, it can literally pull crawl space air into the living envelope.
That matters because crawl spaces commonly have exposed earth, thin vapor barriers, low insulation quality, and limited drainage control. Basements, even unfinished ones, are often more enclosed. When those spaces share framing cavities, plumbing penetrations, beam pockets, or open access doors, the wetter environment influences the drier one.
The result shows up in ways homeowners do not always connect back to waterproofing. A dehumidifier in the basement runs constantly. The rim joist develops mold. Flooring above the transition area feels cupped or smells stale. Efflorescence appears on one side of the basement wall but not the other. A sump pit cycles more often after a crawl space gets wet, even when the basement floor itself looks dry. These are clues that the water problem is not isolated.
What water is actually doing in these homes
Water reaches a basement and crawl space connection through several routes at once. Surface runoff may collect against one part of the foundation because grading is poor or downspouts discharge too close to the house. Groundwater may rise seasonally and create hydrostatic pressure against the basement walls and under the slab. The crawl space may wick moisture upward from exposed soil even without any obvious standing water.
Then there is the construction itself. In older homes, the crawl space foundation and basement foundation were sometimes built in phases or tied together with less care than we would expect today. The cold joint where one wall meets another can crack. Footing elevations may differ. Drain tile, if it exists at all, may stop at the basement perimeter and never address the crawl space section. That creates a split system where one side sheds water and the other stores it.
A common failure point is the shared wall or short connector wall between the basement and crawl space. Water collects in the crawl space, builds humidity, and then moves through openings around pipes, sill plates, ducts, or framing gaps. If the basement side has been finished, the first sign may be stained baseboard, swollen drywall, or a persistent earthy smell behind a mechanical room wall.
The first step is diagnosis, not product selection
Homeowners are often pitched a fix before anyone has mapped how water enters and moves. That is backwards. Good basement waterproofing starts outside, continues below grade, and finishes with interior moisture control. In a house with crawl space connections, the inspection should include both spaces on the same day, ideally under conditions that reveal active problems.
I like to look for a pattern rather than a single defect. Is the wettest part of the crawl space directly below a valley where roof runoff concentrates? Does the basement leak only after prolonged rain, suggesting rising groundwater, or immediately during storms, suggesting surface entry? Is condensation forming on ductwork because summer humidity in the crawl space is high, or because air conditioning lines are uninsulated? Each answer pushes the repair plan in a different direction.
A proper assessment usually includes visual inspection of foundation walls, floor slab, pier bases if present, joist pockets, utility penetrations, and the soil surface in the crawl space. It also helps to note grading, gutter performance, downspout termination, and any signs of settlement. Moisture meters can be useful, but the building itself often tells the story if you know where to look.
Exterior water management still does the heavy lifting
Most persistent foundation moisture problems start with water that should never have been allowed to accumulate near the house. This sounds basic, yet it is the part most often skipped because it is less dramatic than installing pumps and liners. In reality, many basement waterproofing jobs underperform because roof water and surface runoff were never brought under control.
A downspout dumping five feet from a foundation can move a surprising amount of water into the soil profile. During a strong storm, a modest roof can shed hundreds of gallons. If that volume is directed toward the side of the house with the crawl space, it may saturate the soil there first, then travel toward the basement wall or the shared footing area.
Grading should encourage water to move away from the house for the first several feet. It does not need to be steep enough to feel awkward, but it must be positive and continuous. Hardscapes can complicate this. I have seen patios and walkways subtly pitched toward the foundation, turning every rain into a controlled delivery system. That issue often hides in plain sight.
When exterior excavation is justified, it should be driven by evidence. If walls are cracked, coatings are failing, or exterior footing drains are absent or crushed, outside work may be the right answer. But excavation alone does not solve a crawl space moisture problem if the soil under the crawl space remains exposed and humid.
Why interior basement systems are only part of the answer
Interior drainage systems, sump pits, wall channels, and vapor liners can be effective. In many basements they are the most practical option, especially where exterior access is limited. But when a basement is connected to a crawl space, interior systems must be designed to receive water and moisture from both zones.
That might mean extending drainage collection to the transition area rather than stopping at the basement perimeter. It may mean routing water from a crawl space drain into the same sump system, provided the pump is correctly sized and discharge is reliable. It may also mean sealing openings between the spaces so the basement is not constantly fed by crawl space air.
One mistake I see is treating the crawl space as separate because it is lower priority or harder to work in. The basement gets a perimeter drain and sump. The crawl space gets nothing more than a thin sheet of plastic loosely spread over the dirt. Six months later the basement smells damp again, the dehumidifier runs nonstop, and everyone wonders why the new waterproofing did not fix it. The reason is simple. The house still has an active moisture reservoir, and the basement remains connected to it.
The crawl space usually needs encapsulation, not a token vapor barrier
There is a large difference between tossing down poly and properly controlling crawl space moisture. An exposed earth crawl space can release a tremendous amount of water vapor into the house. Even when the soil does not look wet, evaporation can be enough to keep wood moisture elevated and indoor humidity uncomfortable.
https://laneucvp240.fotosdefrases.com/how-proper-drainage-complements-basement-waterproofingFor homes with basement connections, crawl space encapsulation is often the missing half of the waterproofing plan. That usually means a durable vapor barrier sealed at seams and carried up walls and piers, along with closure of vents if the assembly is being brought into the conditioned or semi-conditioned envelope. In many cases, drainage matting or a perimeter drain under the liner is added when water intrusion is active rather than occasional.
The details matter. If the liner stops short of the shared wall, humid air will bypass it. If piers are left unsealed, vapor can continue to rise around their bases. If the access door leaks and outside summer air pours in, condensation risk remains. Encapsulation is one of those jobs where a neat appearance is not enough. Continuity is what counts.
Where the transition area fails most often
The connection between basement and crawl space tends to be messy by nature. It may contain utilities, duct trunks, support beams, low headroom, and rough framing. Because it is inconvenient to reach, it is also where important sealing work is often skipped.
The most common trouble spots include:
- the shared wall where different foundation sections meet
- penetrations for plumbing, gas, electrical, or HVAC
- the rim joist and sill area above the connection
- the access opening or framed doorway between spaces
- low points where water from the crawl space can pond before entering the basement
Each of these can carry either bulk water, water vapor, or humid air. Bulk water is the obvious threat, but air leakage is often the chronic problem that keeps materials damp year round. A basement can be technically free of seepage and still perform badly if it is pulling crawl space air through an unsealed band joist and utility openings.
I once inspected a house where the owner was convinced the basement walls were leaking because the mechanical room felt wet every summer. The walls were fine. The real issue was an open chase where ductwork crossed from the basement into the crawl space. The crawl space had bare earth and no humidity control. Warm, damp air was moving straight into a cool room, condensing on metal and making everything feel clammy. The waterproofing plan changed completely once that was identified.
Sump pumps, drains, and backups need to be sized for the whole house, not one zone
When the crawl space drains into the same collection system as the basement, the pump is serving a larger water load. That seems obvious, but it is frequently overlooked. A sump pump that was adequate for a small basement may cycle too often or fall behind once the crawl space drainage is tied in.
The pump basin should be large enough to reduce rapid cycling, and the discharge line should send water far enough away that it does not simply return to the foundation. In cold climates, freeze protection matters. In any climate, a backup power strategy is worth discussing if the property sees regular outages during storms. If the house depends on one sump to protect both the basement and crawl space, losing that pump can create a bigger problem than before because the system is now centralized.
This is also where judgment matters. Not every home needs the most elaborate setup on the market. But if you have a finished basement, expensive mechanical equipment, or a history of heavy water entry, the value of redundancy becomes easier to justify.
Humidity control is part of Basement Waterproofing
People often think of Basement Waterproofing as a matter of stopping leaks. In a mixed basement and crawl space house, humidity control belongs in the same conversation. A dry-looking basement can still support mold growth if relative humidity sits too high for long periods. Wood framing, stored belongings, and insulation all respond to moisture in the air, not only liquid water on the floor.
A dehumidifier can help, but it should not be asked to solve structural moisture by itself. If the crawl space is unsealed, the unit may run constantly and still struggle. Once drainage, vapor control, and air sealing are corrected, dehumidification becomes more effective and more affordable to operate.
Ductwork is another factor. If HVAC ducts pass through the crawl space, any leakage can worsen pressure imbalances and moisture migration. Sealing and insulating ducts may not sound like waterproofing work, yet it often changes the moisture profile of connected spaces. That is especially true in summer when cold ducts can sweat in humid crawl spaces.
Repair approaches that often work well together
The strongest results usually come from combining exterior water management with interior moisture control. The exact mix depends on how the house is built and what the site is doing, but the repairs often complement each other rather than compete.
A solid plan may include:
- correcting gutters, downspouts, and grading to reduce water at the foundation
- installing or improving interior drainage and a sump system where seepage is active
- encapsulating the crawl space with sealed vapor barrier and targeted drainage if needed
- air sealing the transition area, rim joists, and utility penetrations
- adding dehumidification sized for the connected space
What matters is sequencing. If you encapsulate a crawl space before addressing standing water, you can trap trouble beneath the liner or stress the system. If you install a sump but leave roof runoff pouring next to the foundation, the pump will do more work than it should. If you dehumidify before sealing leaks, energy use stays high and results stay mediocre.
What homeowners can realistically expect
Not every house becomes laboratory dry, and honest waterproofing contractors should say that. Some older homes have stone walls, irregular footings, low crawl spaces, or site limitations that call for compromise. The goal is usually control, not perfection. That means managing water so the basement and crawl space stay structurally sound, reasonably dry, and usable without chronic odor, mold, or material damage.
A good result looks like this: no recurring standing water, lower and more stable humidity, no new efflorescence spreading across walls, no persistent musty odor migrating into living space, and no visible deterioration of framing or finishes near the connection area. It may also mean that a dehumidifier runs less, the sump cycles predictably rather than constantly, and seasonal rainstorms stop dictating how the house smells.
Red flags that call for a deeper look
Some conditions suggest the problem is beyond basic maintenance and deserves prompt professional review. Repeated water entry after moderate rain is one. So is visible mold on framing near the basement-crawl space transition. Cracking with inward wall movement, rotted sill plates, or settlement around the shared foundation area can point to structural concerns in addition to moisture.
Watch for these signs:
- pooled water that returns in the same area after storms
- white mineral deposits or dark staining spreading across masonry
- soft wood, fungal growth, or insulation falling from joist bays
- strong odor that worsens in humid weather
- sump pumps that run unusually often or fail to keep up
These symptoms do not all mean the same thing, but they do suggest the house needs more than a cosmetic fix. Paints, sealers, and odor absorbers rarely solve the underlying issue when moisture is moving through both a basement and a crawl space.
Choosing a contractor without getting sold the wrong system
This kind of work rewards careful diagnosis, not a one-size-fits-all package. When you meet contractors, pay attention to whether they examine both spaces thoroughly and discuss how they interact. If someone spends ten minutes in the basement, never enters the crawl space, and still prescribes a full waterproofing system, that should raise doubts.
The better conversations tend to be specific. You want to hear where water is likely entering, how it is traveling, what can be fixed outside versus inside, how the crawl space connection changes the scope, and which improvements are essential versus optional. Good contractors also explain maintenance. Sumps need testing. Dehumidifiers need draining or service. Encapsulation liners should be protected from storage abuse and future trades.
Price alone is a poor guide here because the cheapest proposal often excludes the very components that make the whole system work together. On the other hand, the most expensive proposal is not automatically the most complete. Clarity is what you are buying, along with workmanship.
The houses that benefit most from an integrated plan
Split-level homes, older additions, houses built into slopes, and homes with partial basements are especially prone to these linked moisture issues. Any time foundation depths change, drainage paths become less straightforward. Add a crawl space with exposed earth and you have a reliable source of humidity unless it is intentionally controlled.
When the work is done thoughtfully, the improvement is often felt before it is measured. The air smells cleaner. Floors above the crawl space feel less damp. Stored items stop taking on that basement odor. Mechanical rooms feel less clammy in summer. Those are practical, lived benefits, not marketing claims.
Basement waterproofing for homes with crawl space connections works best when the house is treated as one moisture system. Stop the water you can outside. Collect and discharge the water that still arrives. Seal the soil. Control the air. Then support the whole assembly with sensible humidity management. That is how you get durable results instead of a temporary reprieve.
ARD Waterproofing
98 Smull Ave, West Caldwell, NJ 07006, United States
+1 917-691-8411
FAQ About Basement Waterproofing
Can you 100% Waterproof a Basement in West Caldwell?
A properly designed system can substantially reduce basement water intrusion, but no method can promise protection against every flood, equipment failure, or future change in site conditions. The first step is identifying whether moisture comes from surface runoff, groundwater, plumbing, or condensation. Solutions may include grading and gutter improvements, drainage, foundation repairs, and a sump system. Review the specific coverage and exclusions of any written warranty.
How much does it cost to professionally waterproof a basement in NJ?
There is no single price that fits every basement. Cost depends on the cause of the leak, the area needing work, access, excavation requirements, drainage design, sump equipment, and restoration of disturbed finishes or landscaping. Request an on-site assessment and an itemized written estimate that explains the scope, exclusions, and maintenance requirements before comparing proposals.
How long does foundation waterproofing last in West Caldwell, NJ?
Service life varies with the waterproofing materials, installation quality, soil and water conditions, and maintenance. Drainage components and pumps may require servicing or replacement even when other parts of the system remain functional. Keep gutters, drainage outlets, and sump equipment maintained, and have recurring leaks or changes in foundation condition assessed. Ask for product-specific expectations and written warranty terms rather than relying on one lifespan for the entire system.